English
 Español
 Français
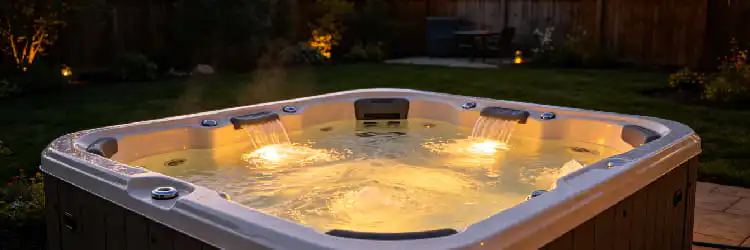
A loud, grinding, or humming hot tub pump is more than just an annoyance; it's a sign that your relaxation oasis is in trouble. When the heart of your spa's circulation and jet system fails, you're faced with a choice: a costly service call or a rewarding DIY hot tub repair project. For the handy spa owner, replacing the pump motor yourself can save hundreds of dollars and put you back in control of your hydrotherapy experience.
This comprehensive guide is designed to walk you through the entire process of a hot tub pump replacement. We'll cover everything from initial diagnosis and safety precautions to the step-by-step replacement and tips for avoiding common mistakes. If you're hearing that dreaded hum or a complete silence where the roar of jets should be, this is the guide for you.
Table of Contents
1.Pre-Repair Checklist: Diagnosis and Safety First
2.Gearing Up: Your Toolkit and Parts List
3.The Main Event: A Step-by-Step Motor Replacement Guide
4.Pro Tips and Common Pitfalls to Avoid
5.Conclusion: Enjoying the Fruits of Your Labor
1.Pre-Repair Checklist: Diagnosis and Safety First
Before you even pick up a wrench, it's crucial to confirm that the motor is the true culprit and to understand the safety measures involved. Rushing this stage can lead to wasted money on unneeded parts or, far worse, a dangerous repair situation.
Is the Motor Really the Problem?
A non-functional pump doesn't always mean a dead motor. A proper diagnosis can save you time and money. Here’s how to troubleshoot common symptoms that are often mistaken for complete motor failure:
- Symptom: The motor hums but doesn't spin.This is a classic sign of a seized shaft or, more commonly, a failed start capacitor . The capacitor provides the initial electrical jolt to get the motor spinning. Replacing a capacitor is a much cheaper and simpler fix than replacing the entire motor.
- Symptom: The pump is completely silent.Before assuming the motor is dead, check the basics. Is the breaker tripped? Is the GFCI outlet reset? Is the pump properly connected to the spa's control board? A loose wire or a tripped breaker is a common cause .
- Symptom: The motor runs for a short time, then shuts off.This often indicates the motor is overheating, which could be caused by bad bearings, low voltage, or a blockage in the plumbing that is forcing the motor to work too hard .
- Symptom: A loud grinding or screeching noise.This is the most definitive sign of failed motor bearings. In this case, a complete hot tub pump replacement is your most reliable solution.
The Unskippable Safety Protocol
Working with water and electricity is inherently dangerous. Your safety is the absolute top priority. Do not proceed with any repair without following these steps meticulously. Some sources strongly advise that only qualified technicians perform this work to avoid electrical hazards, property damage, or serious injury . If you are at all unsure, call a professional.
- COMPLETE POWER DISCONNECT:This is the single most important step. Go to your home's main circuit breaker panel and switch off the breaker dedicated to your hot tub. Don't just turn it off at the spa-side disconnect. You must ensure there is zero power going to the unit .
- VERIFY POWER IS OFF:Use a voltage tester at the spa's control pack where the pump connects to confirm that the power is truly off . Do not skip this verification.
- ALLOW FOR COOL-DOWN:If the pump has been running recently, the motor can be extremely hot. Let it cool down completely before you attempt to touch or remove it to avoid burns .
- MANAGE THE WATER:To avoid a flood in the equipment bay, you need to stop water from flowing out of the plumbing. Most modern spas have slice or gate valves on either side of the pump. Close these firmly. If your spa doesn't have these, you will need to drain the tub completely.
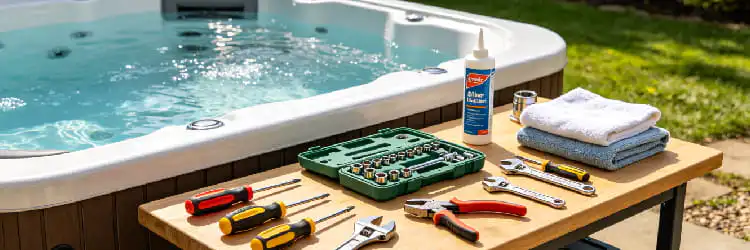
2.Gearing Up: Your Toolkit and Parts List
Having all your tools and parts ready before you start will make the process infinitely smoother. Scrambling to find a specific wrench mid-repair is a frustration you can easily avoid.
Essential Tools and Materials
The tools required are generally standard for any DIY enthusiast. You likely have most of them in your garage already.
|
Category |
Item |
Web Page Reference(s) |
Notes |
|
Hand Tools |
Screwdrivers (Phillips and Flat-head) |
|
For removing the control box cover and motor housing screws. |
|
|
Adjustable Wrenches or Channel-lock Pliers |
|
Essential for loosening the large PVC union nuts on the plumbing. |
|
|
Socket/Ratchet Set |
|
For removing the bolts that secure the pump to the spa's base and the motor to the wet end. |
|
|
Allen Keys (Hex Keys) |
|
Sometimes needed to hold the motor shaft steady when removing the impeller. |
|
Supplies |
Silicone or Rubber-Friendly Lubricant |
|
For lubing new o-rings to ensure a perfect seal. |
|
|
Rags or Towels |
N/A |
For cleaning up spilled water and old grime. |
|
|
Camera (Your Smartphone) |
|
Crucial! Take pictures of the wiring before you disconnect anything. |
Sourcing the Correct Replacement Motor and Parts
Getting the wrong motor is a common and costly mistake in DIY hot tub repair. The physical unit must be an exact or manufacturer-approved replacement.
- The Replacement Motor:The most important information is on the sticker on the side of your old motor. You need to match the following specifications precisely:
- Voltage:(e.g., 115V or 230V)
- Frame Size:(e.g., 48FR or 56FR). This determines the bolt pattern for mounting.
- Horsepower (HP):Match the existing HP.
- Speed(s):Is it a 1-speed or 2-speed motor?
- You can often find the correct replacement by searching for the part number listed on the motor's label .
- The Pump Seal Kit:DO NOT REUSE THE OLD SEAL.A pump shaft seal is a two-part mechanical seal that prevents water from leaking from the wet end into the motor. It is the most common point of failure and must be replaced whenever you separate the motor from the wet end . These are specific to your pump model (the "wet end"), not the motor.
- Gaskets and O-Rings:It is best practice to replace any o-rings or gaskets you encounter, especially the large ones in the plumbing unions . They are inexpensive and provide peace of mind against future leaks.
3.The Main Event: A Step-by-Step Motor Replacement Guide
With your safety checks complete and your tools laid out, it's time to perform the replacement. Work slowly and methodically.
Step 1: Preparation and Disconnection
- Confirm Power is Off:Double-check with your voltage tester.
- Close Water Valves:Securely close the slice valves on both sides of the pump. If you don't have them, ensure the spa is drained.
- Access the Wiring:Open the spa's control pack cover. Locate the wires coming from the pump motor.
- DOCUMENT THE WIRING:Take a clear, well-lit photo of where each wire from the motor connects to the control board. Note the colors and their terminals (e.g., black to "high speed," red to "low speed," white to "neutral," green to "ground") .
- Disconnect Electrical:Carefully disconnect the pump's power cord and the copper grounding wire from the control board and motor housing .
Step 2: Removing the Old Pump and Motor Assembly
- Loosen Plumbing Unions:Use your large pliers or an oil filter wrench to unscrew the two large union nuts that connect the pump to the spa's pipes. Be prepared for a small amount of residual water to spill out.
- Unbolt the Assembly:The entire pump and motor assembly is secured to the floor of the spa with several bolts. Use your socket set to remove these bolts .
- Lift it Out:You should now be able to carefully lift the entire pump and motor assembly out of the hot tub cabinet and place it on a stable work surface.
Step 3: Separating the Motor from the Wet End
This is the core of the operation. You are separating the electrical part (the motor) from the plumbing part (the "wet end," which contains the impeller and moves the water).
- Locate the Through-Bolts:Look at the back of the wet end where it meets the motor. You will typically see four long bolts that run through the wet end housing and thread into the face of the motor.
- Remove the Bolts:Using your socket wrench, carefully remove these four bolts .
- Separate the Halves:Gently pull the motor away from the wet end. It may be stuck slightly due to the old seal, but it should come apart with steady pressure . The impeller will stay inside the wet end.
- Remove the Impeller:To get to the pump seal, you must unscrew the impeller from the motor shaft. To do this, you may need to hold the motor shaft still from the back end with a screwdriver or Allen key while you twist the impeller counter-clockwise.
- Remove the Old Seal:Once the impeller is off, you will see the first half of the two-part mechanical seal. Carefully pry it out. The other half (usually a white ceramic ring in a rubber boot) is located in the back of the wet end housing. Pop it out.
- Clean Everything:Thoroughly clean all surfaces where the new seals will sit. Any grit or residue can cause the new seal to fail.
Step 4: Mounting the New Motor
- Install the New Seal:This is a delicate process. Do not touch the polished faces of the new seal with your bare hands. The oils from your skin can cause it to fail.
- Install the ceramic half of the seal into the back of the wet end housing. Wet the rubber boot with a bit of water to help it slide in. Press it in firmly and evenly until it is seated.
- Slide the spring-loaded half of the seal onto the new motor's shaft.
- Re-attach the Impeller:Screw the impeller back onto the new motor's shaft until it is snug.
- Join the Motor and Wet End:Carefully align the new motor with the wet end and slide them together. Re-install the four through-bolts and tighten them in a star pattern to ensure even pressure .
Step 5: Reinstallation and Reconnection
You will now reverse the removal process.
- Position the Assembly:Place the newly assembled pump and motor back into its original position in the spa cabinet and secure it with the mounting bolts.
- Reconnect Plumbing:Hand-tighten the union nuts onto the pump. Ensure the o-rings are in place and lubricated. Give them a final quarter-turn with your wrench to ensure they are snug, but do not over-tighten.
- Reconnect Electrical:Referring to the photo you took earlier, reconnect the wires to the control board exactly as they were before. Ensure all connections are tight and secure. Re-attach the green or copper ground wire to the designated grounding lug .
Step 6: The Final Test
- Open Water Valves:Slowly open the slice valves.
- Check for Leaks:Carefully inspect the unions and the point where the motor meets the wet end for any drips. If you see any, close the valves and address the issue (likely a misaligned o-ring or a seal issue).
- Prime the Pump:This step is vital to prevent the pump from running dry, which can destroy the new seal. With the power still off, slightly loosen the union on the top-facing output of the pump until you hear air hissing out and see a steady trickle of water. Once the air is purged, tighten the union back up.
- Power Up and Test:Go back to the breaker panel and restore power to the hot tub. Turn on the pump from the spa-side controls and check for normal operation . Check again for any leaks while the pump is running.
4.Pro Tips and Common Pitfalls to Avoid
Many DIY repairs are derailed by simple, avoidable mistakes. Heed this advice from experienced technicians to ensure your loud spa motor fix is a one-time job.
Mistake #1: Reusing Old Seals and Gaskets
This is the number one cause of post-repair leaks. A pump seal kit and union o-rings are inexpensive parts. It is false economy to skip replacing them. A leak can drip onto your new motor, causing it to fail prematurely . Always install new seals and gaskets.
Mistake #2: Over-tightening Connections
The plumbing components in a hot tub are made of PVC or ABS plastic. Overtightening the large union nuts with a wrench can easily crack them, leading to a much more expensive and complicated repair . The rule is "hand-tight, then a quarter-turn more with the wrench." The o-ring does the sealing, not the force of the connection.
Mistake #3: Forgetting to Prime the Pump
A pump is designed to move water, not air. Running it "dry" for even a few seconds generates immense heat at the shaft seal, which can damage or destroy it. The air trapped in the plumbing after a drain and refill must be bled out. The priming process described in Step 6 ensures the wet end is full of water before the motor ever spins up.
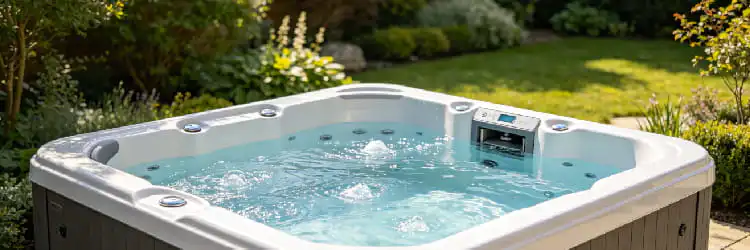
5.Enjoying the Fruits of Your Labor
Congratulations! By following this guide, you have successfully completed a major hot tub pump replacement. You've not only solved the problem of a noisy or broken pump but have also saved a significant amount of money and gained invaluable knowledge about how your spa operates.
The key to a successful DIY repair is patience, preparation, and a commitment to safety. Now, all that's left to do is secure the cabinet panel, let your hot tub heat up, and sink into the warm, bubbling water. You've earned it. Enjoy the peace, quiet, and powerful jet action of your expertly repaired spa.
_02-2.jpg?imageView2/2/w/320/h/320/format/jpg/q/75 "Whirlpool Massage Bath SPA RL-6155/1570")
-2.jpg?imageView2/2/w/320/h/320/format/jpg/q/75 "67'' Oval Freestanding Bathtub RL-MF1235/1708")


.jpg?imageView2/2/w/320/h/320/format/jpg/q/75 "Glass freestanding shower cabin shower RL-513(B)")

_sherry_01.jpg?imageView2/2/w/320/h/320/format/jpg/q/75 "Steam Cabin RL-D04(B)-Sherry")
_01.jpg?imageView2/2/w/320/h/320/format/jpg/q/75 "Adult bathtub cabin shower room steam RL-D03(B)")